Usage
The table plan tab
After login, the table overview shows the TISCHPLAN (table plan) tab on the far left. It renders the floor plan inline in place of the tiles; the familiar tile views (Alle Tische, all tables, and Meine Tische, my tables) stay one tap away.
The status colors at runtime:
- white = free (the table exists only in the layout, no open receipt)
- green = your own table (an open receipt of the logged-in waiter), with the amount
- orange = another waiter's table, with the waiter's name at the bottom
of the table; the amount only appears with the permission
TABLE_SEE_AMOUNT_OF_OTHER_TABLES - red badge = several open receipts on the table
Tapping opens the table: a free table starts a new receipt (like "Neuer Tisch" (new table) plus number), an occupied one opens its receipt. If several receipts hang on the table, even from different waiters, the receipt picker always appears, your own receipts first.
Floors and areas are switched via the area dropdown at the bottom left; the plan immediately shows the matching floor. Occupied tables without a position in the plan appear as clickable chips ("Nicht im Plan", not on the plan) below the plan; no table gets lost.
The plan updates live through the POS's normal Table Service updates; nobody has to reload.
Moving tables and changing owners
The native actions "Tische umziehen" (move tables) and "Eigentümer wechseln" (change owner), the buttons at the bottom right, also work in the plan: in selection mode a tap selects the table instead of opening it (blue frame plus check mark; tables that cannot be selected are dimmed. As in the tile view, only your own tables are selectable). "Weiter" (continue) runs the action as usual, including the permission check.
Combined tables
For a large party, two or more tables are combined into one unit: a shared frame with a shared label ("3+4"), they move together and react to a tap as one unit (open receipts of all members are offered for selection; if the unit is free, the lowest number opens). "Teilen" (split) separates them again.
Combining is pure table plan logic. The receipts are merged as usual via the native action "Tische umziehen" (move tables), and the POS still keeps one receipt per table.
Tablets, handhelds and smartphones
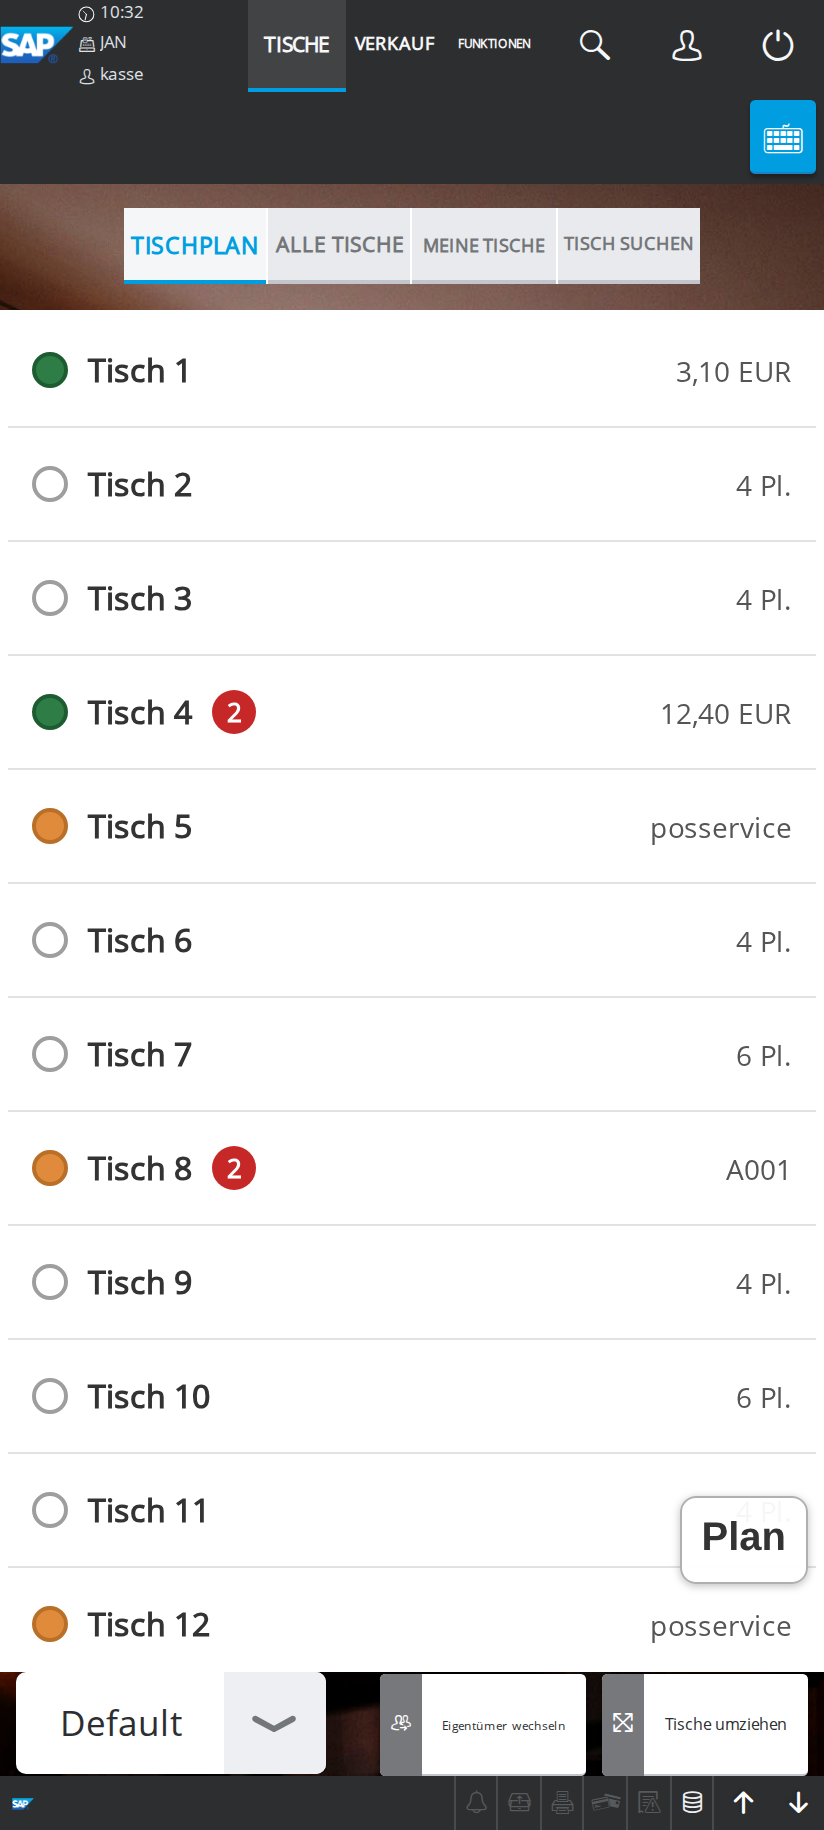
The plan scales properly instead of shrinking into illegibility:
- Zoom and pan: pinch gesture or dragging, plus
+/−/ "Alles" (fit all) buttons. When zoomed out, small tables show only their legibly scaled label; amount and seats reappear when you zoom in. - Every table has a tap target of at least 44 px, regardless of the displayed size.
- Below ~520 px width (smartphones) the tab starts as a table list with the same colors and actions; a "Plan"/"Liste" (plan/list) button switches between the two.
Editing the plan at the POS
Tables rarely stand in the same spot forever. So the plan can be changed directly at the POS, without a file and without a restart:
- In the table plan tab, tap "Plan bearbeiten" (edit plan) at the
bottom. The button only appears for users with the permission
SETTINGS_SCREEN(the ones who may also open the POS settings). - Tap a table to select it, drag to move it (snaps to a 10-unit grid). The empty canvas still pans the plan and two fingers zoom; in edit mode a tap does not open a receipt.
- Via the toolbar: + Tisch (add table; a numeric pad suggests the next free number), Zusammenstellen / Teilen (combine/split), Nummer (number), Plätze (seats), Form (shape, square/round), −/+ (size), Löschen (delete), Rückgängig (undo).
- Speichern (save) writes the plan, Verwerfen (discard) restores the saved state, Fertig (done) leaves the mode (with unsaved changes you are asked first).
Built-in guards prevent silent mistakes: duplicate table numbers are rejected, a table with an open receipt cannot be deleted, and every save creates a backup (see Operations).
The POS deliberately offers what daily work needs: moving, creating, deleting and combining tables. Walls, zones and text labels are drawn in the editor at your workstation or in the Table Plan Hub.
If saving fails with "HTTP 403", the POS is being accessed under a foreign name; see "Access via host name or reverse proxy" in the Configuration.
Saving goes to this POS's layout file, or, if a Table Plan Hub is set up, centrally for the whole business.
The Table Plan Editor at your workstation
With the editor you draw the floor plan graphically: place tables (square or round), walls, a bar, zones and text labels, drag and resize on a 10-unit grid, one plan per table area. For the two variants (program or HTML page) see Installation.
The program starts a local editor server and opens the default browser:
tableplan-editor                       # bearbeitet ./tableplan.json
tableplan-editor C:\CCO\POSPlugins\AP\tableplan.json
tableplan-editor -port 8080 -no-browser
- On startup the given file is loaded (if it does not exist yet, you start with an empty plan, and saving creates it).
- Save ("Speichern", or
Ctrl+S) writes exactly this file; "Speichern unter…" (save as) asks for a different path. - Quit via the button at the bottom right or
Ctrl+Cin the window. - The editor is reachable locally only; writing calls additionally require a token that only the opened page knows.